In this recipe you will learn to make an ambient basic sourdough 50:50 tin loaf
Learning Objective
You will learn how to use your basic tin loaf sourdough bread formula and transform it into a focaccia quite simply by adding some extra ingredients.
Makes: | 12 |
---|---|
Level: | Beginner |
Created Over: | 3 days |
Kind of Bake: | Ambient overnight – 10-minute style – mixed in the evening and baked in the morning |
Gut Factor: | Introducing wholegrain & probiotics |
Diversity Score: | 5 if you include salt, oil and butter |
---|---|
Suggested Botanical Blend: | Just use shop bought flour |
Prebiotic: | The fibre in wholegrain flour is a prebiotic |
Probiotic: | Cultured Butter |
Avoid if: |
|
![](https://thesourdoughschool.com/wp-content/uploads/2021/07/2021-07-bake-one-give-one-52-1040x520.jpg)
Dear Club members, this is an untested and unedited recipe, however I have written this up from a very tried and tested recipe from my new book (to be released later this year) and it is also using my new online recipe template. I am excited and a bit nervous...and so if you are willing to test this recipe and give me feedback I would be very grateful. This is a really good insight into the new book and I would LOVE to know what you think to the technique and the new template design.
Please fill in your feedback form here. This form is detailed so you might like to print it off first so you can view it beforehand.
Introduction
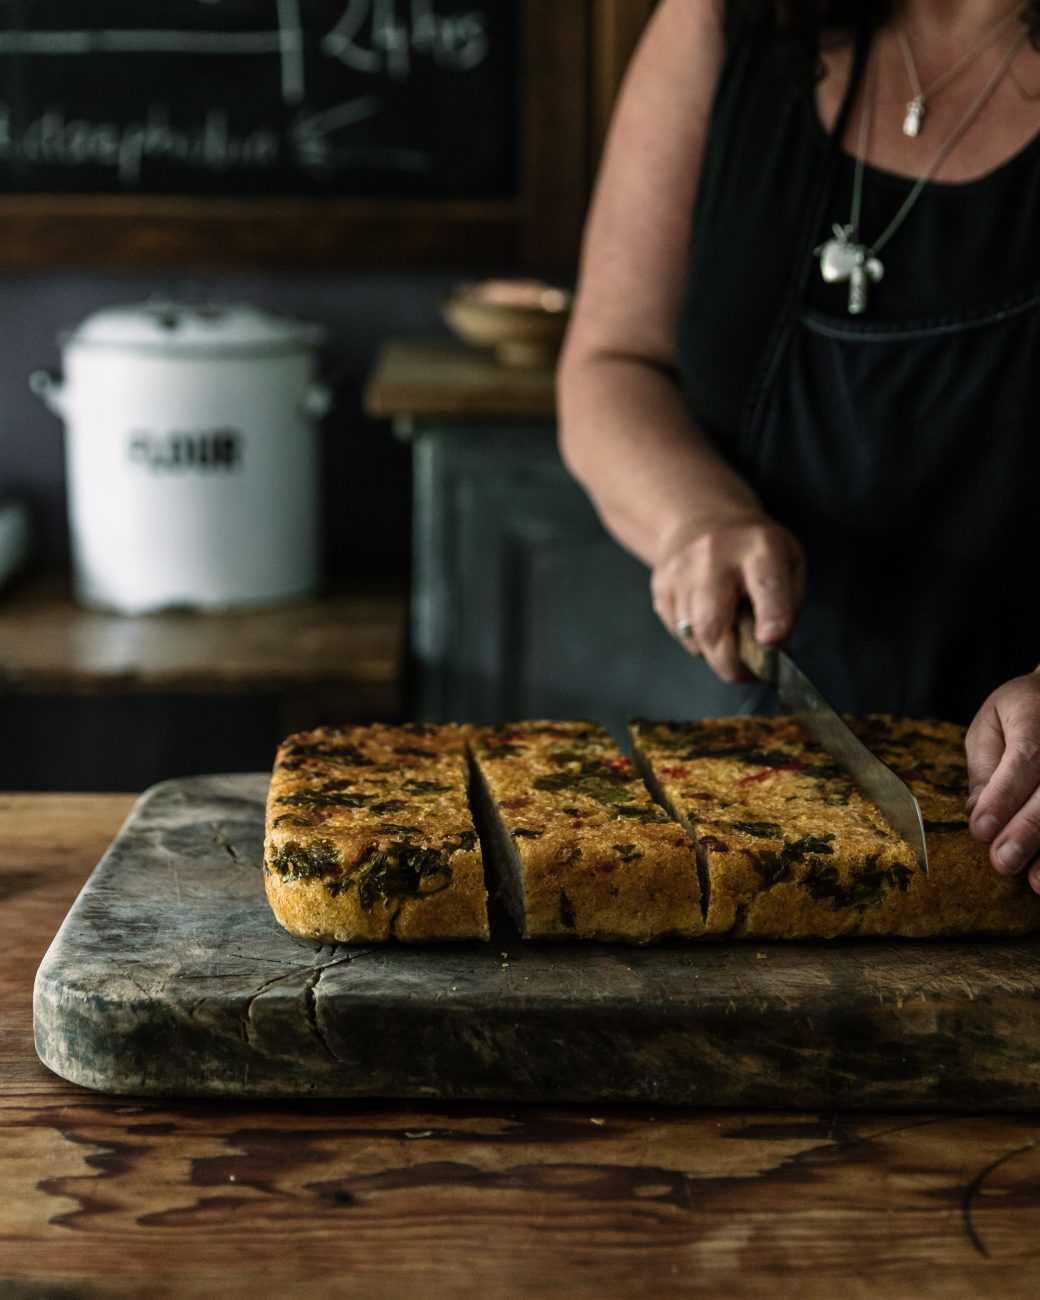
One of the main reasons that I love the approach to the 10 minute tinned focaccia is that it makes really quick, simple suppers. It's an incredibly versatile dough – you can adapt these recipes to whatever's in your fridge or to whatever's in season. If this loaf is too much bread for you then simply halve the recipe or better still cut into 2 loaves and give one away. Or you can also slice and freeze one and eat the other of course.
Equipment
- Mixing bowl
- Whisk
- Spatula
- Rectangular tin 34 x 24 x4cm OR rectangular pan 13 x 9 x 2 inches (USA
- Olive oil spray
- Oven gloves
- A jug of tepid water in which to dip your hands when handling the dough
Tin Size
- Rectangular tin 34 x 24 x4cm OR rectangular pan 13 x 9 x 2 inches (USA)
Tin Advice
Grease generously with butter, then add a tablespoon of flour and tap until covered and knock out any excess
Suggested Starter
Status of Starter
bubbly, lively second-build starter
Hydration
75%
DDT
27°C (80°F)
Flours
To Ferment Your Dough
- 200g lively 2nd build starter
For The Dough
- Total water 750g at 28C/82F (remember to reserve 50g to bassinage with)
- 500g organic stoneground wholegrain flour 11.5% protein
- 500g organic strong white roller milled flour (ideally about 13% protein)
- 20g fine sea salt
- Butter to grease the tin with
- Extra ingredients:
- 150g olive oil
- 30g chilli oil
- Large handful of parsley, torn
- 5 or 6 cloves garlic, roughly chopped
- 1 or 2 chillis, chopped
- Pinch of coarse sea salt
Baking Time
Preheat your oven to 220C/428F/gas mark 7 for 30 minutes then drop oven temperature. Before baking drizzle the olive oil down the sides of the loaf before putting the tin in the oven. Bake for 45–50 minutes: it should have a beautiful burnished copper crust
Oven Position
middle shelf
Preheat Oven To
220°C/200°C fan/425°F/gas mark 7
Bake At
180°C/160°C fan/350°F/gas mark 4
Baking Tips - During/After Baking
- Remove the bake from the oven and leave to cool in the tin for 5–6 minutes before turning it out onto a wire rack to cool completely.
- This recipe is finished with a probiotic syrup, vinegar or honey. Remember to drizzle over the syrup/honey to finish while the bake is still warm – but not too hot, or it will denature your probiotics.
Tutorials
Total Active Time: 9 minutes
Step | Timings | Active Time (min) |
---|---|---|
Essential time saving tips before you begin baking | Before you start | |
Refresh starter | Day 1 8pm first build | 1 |
Refresh starter again | Day 2 8am second build | 1 |
MIX vigorously. Then leave for 30 minutes. | 7:00pm | 2 |
Autolyse for 30 minutes | 7:02pm | |
Bassinage 1 incorporate 25g of the reserved water. | 7:30pm | 1 |
Bassinage 2 incorporate the last 25g of the reserved water. Rest for 15 minutes. | 7:45pm | 1 |
Prep tin. Transfer the dough to the tin & cover. Leave to prove overnight on the side in the kitchen | Day 2 8pm - Overnight | |
Pop your starter back into the fridge | Day 3 8am | 1 |
Bake your bread | Day 3 8am | 2 |
Total Active Time | 9 |
Guidance, tips & techniques
Before you begin baking please read these essential time saving tips to make sourdough in just 10 minutes. To put it plainly, you won't be able to make this recipe in 10 minutes if you do not follow the advice on this page.
Build your starter
If you bake every day then you might not need to double refresh your starter, however if you leave it more than three days between bakes then do a back-to-back double refreshment. This is two refreshments that rebuild your starter to be robust enough to raise your bread. There are many recipes for what to do with the discard here.
Mix
This is a quick mix. Add just 700g of the water and your lively bubbly sourdough starter, ( remember to reserve 50g of the water) whisk and then add the flours and the salt and mix your dough vigorously using a strong spatula for about 2 minutes. It will come together to form a stiff ball. Leave this to rest on the side in the kitchen for 30 minutes. It is a good time, while your dough is autolysing, to refresh the remaining starter in your jar and set it aside to ferment overnight at room temperature.
* Note: yes I do want you to put the salt in with the initial mix of the dough. recipes later on will ask you to hold back salt, but not with this technique.
Bassinage
When the gluten has had 30 minutes to develop, you can begin your bassinage. Bassinage is the technique of adding water to dough over a period of time. It's easy to do. You just add 25g of the water at a time to the bowl and squidge the dough with your hands to mix this in. It should take less than 1 minute to mix in the first 25g water. Cover and leave the dough for another 30 minutes. Repeat with the remaining 25g of water then allow the dough to rest for about 10 minutes. Again this should take less than a minute. There are detailed instructions on how to do this in the link in the steps.
Prove
Pour the olive oil and chilli oil in the tin, making sure that it is evenly distributed around the tin. Next, scatter the parsley evenly over the oil. Add the garlic, chopped chilli (add as much heat as you fancy!) and a pinch of salt. Place the dough in the tin, making sure the oil works its way up the side of the dough by moving it around a little. This way the dough won't stick to the tin as it rises. Cover with a shower cap and leave to prove on the kitchen table overnight. My kitchen is usually about 21C/70F.
Put your starter back in the fridge
Day 3 at 8 am is an important moment as both your loaf and your starter should have doubled overnight. So, before you bake your loaf in the oven, put your starter back into the fridge until you next want to rebuild it again for another bake.
Tips for baking your bread
Before baking, spray a very small amount of olive oil over the top of the dough in the tin to give you a golden finish. When you bake this focaccia, you must put the tin on a wire rack in your oven because the fierce oven can cause the parsley to burn in the bottom of the tin. Keep an eye on the tin so it doesn't burn.
If you like a crustier finish then you can also remove your loaf from the oven and if you wish, you can return the ‘naked’ loaf (without the tin) to the oven for a few minutes to create a lovely crunchy crust on the parts of the loaf that were covered by the tin.
Probiotic Serving Suggestion
How to Store
Once cool, store your loaf in a tin as the honey and butter can make it a bit too sticky for a tea towel. Best enjoyed within 3–4 days.
![](https://thesourdoughschool.com/wp-content/uploads/2021/11/2106SourdoughSchool-9273-330x413.jpg)
![](https://thesourdoughschool.com/wp-content/uploads/2021/11/2106SourdoughSchool-9285-330x413.jpg)
![](https://thesourdoughschool.com/wp-content/uploads/2021/11/2106SourdoughSchool-8405-330x413.jpg)
Learning Outcome
You will understand how quick and easy it can be to transform a basic sourdough tin loaf into a very different bread with some simple alterations.