In this recipe you will learn to make an ambient basic sourdough 50:50 tin loaf
Learning Objective
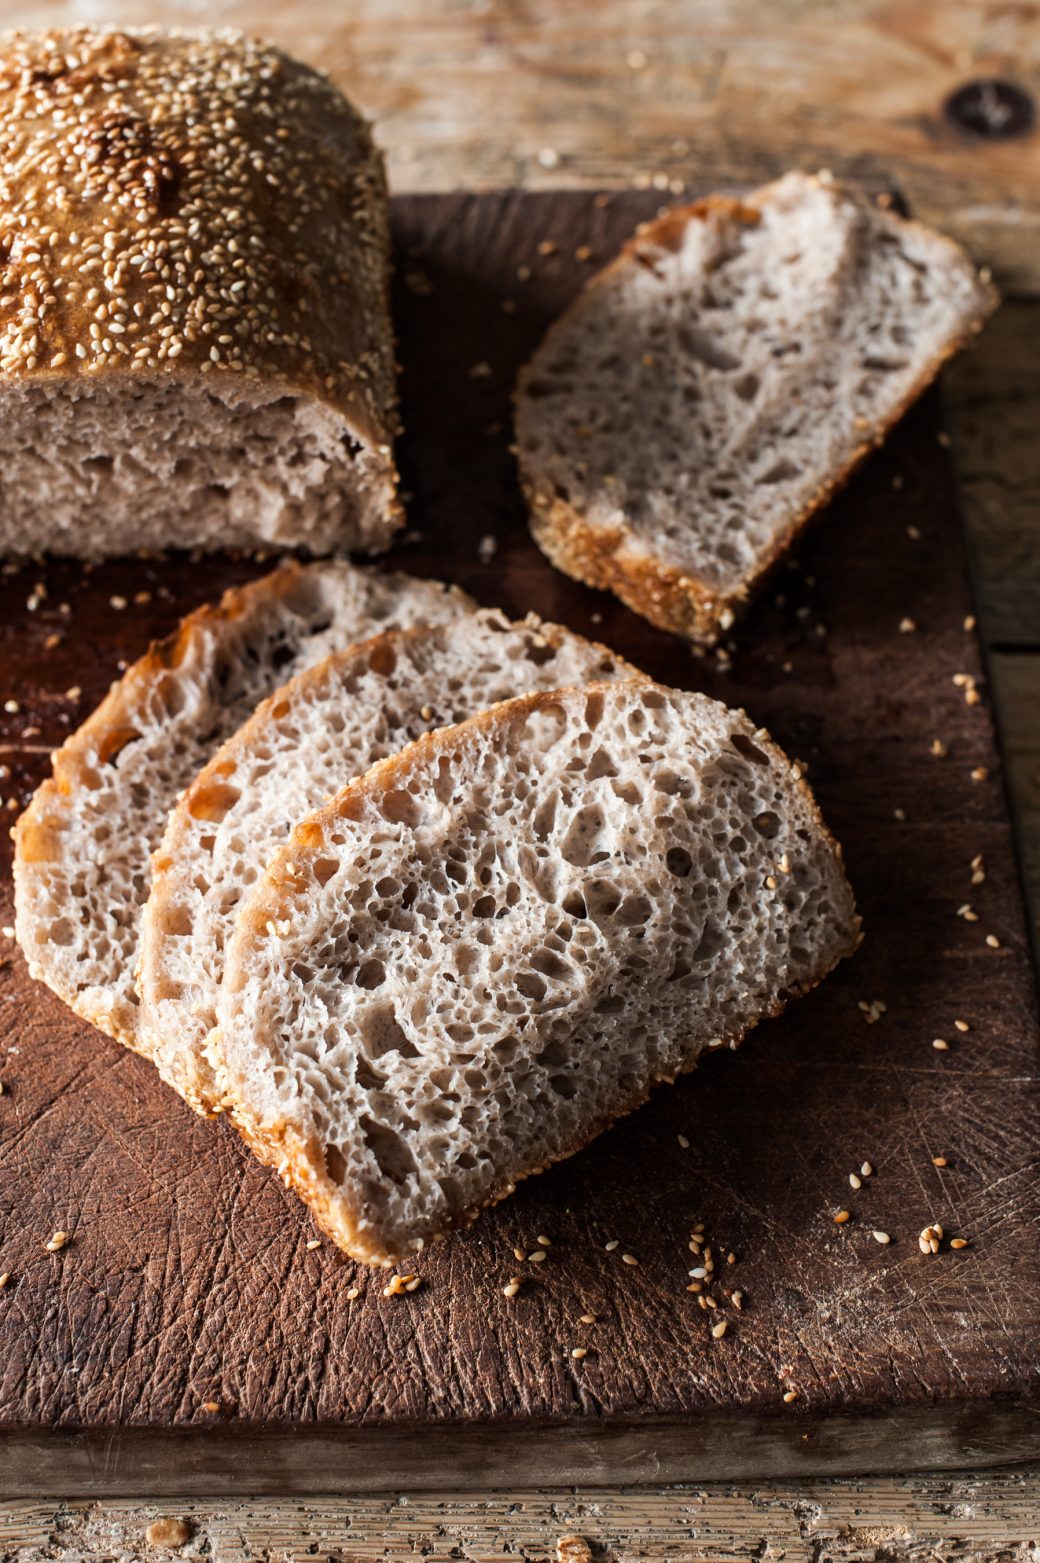
I appreciate that the boule is the glory bread, but baking tinned loaves gives you a controlled way to learn about how flour behaves with out the disappointment of a disastrous first boule. Before I attempt to make a boule with a new flour, I make this simple tinned loaf.
Here, I want you to bake this TWICE, using two different brands of spelt flour. By comparing two 'spelts', you will begin to understand that flour, even when it is in a bag with the same name on, can be very different. As you compare the two bakes, you will also begin to understand how to make small changes based on your flour and the ambient conditions on the day.
Makes: | 2 |
---|---|
Level: | Absolute beginner |
Created Over: | 3 days |
Kind of Bake: | Ambient overnight – 10-minute style – mixed in the evening and baked in the morning |
Gut Factor: | Introducing spelt and also honey as a prebiotic |
Diversity Score: | 8 if you include salt, oil and butter |
---|---|
Suggested Botanical Blend: | Just use shop bought flour |
Prebiotic: | The fibre in wholegrain flour is a prebiotic |
Probiotic: | Cultured Butter |
Recommended For: |
|
![](https://thesourdoughschool.com/wp-content/uploads/2021/05/Soourdough-Sesame-Honey-4-1040x1563.jpg)
Introduction
This recipe uses spelt flour, which is significantly different from commercial wheat flour. Often, it is more active, and the gluten structure is different. Spelt will not always stand up as a boule on its own, but I want to introduce you to this grain because I use in almost every bake. The recipe includes my suggestions for timings and temperatures that suit a typical working day.
Today's lesson introduces a sourdough loaf record form (see link in the step-by-step instructions), and I would love it if you could share your bakes in the forum. I am particularly interested in you noticing the different textures, flavours and feel of working with spelt flour. If you get stuck, post a photo on the forum, along with your loaf record sheet, and I will be able to give you some tips. This is an ambient bake, and as the the timings are regular, you should find you get into a rhythm and begin to understand the principles of building your starter and how to fit it in with your daily schedule.
Remember that this recipe makes two loaves. One of the reasons for this is that a larger amount of dough holds its temperature better when fermenting, but it also means you have the option to bake two loaves and give one away. Because you will also be baking this twice, if you feel this is really too much bread for you, then simply halve the recipe.
Connect
As part of learning about connecting to your bread, I am incorporating two really lovely probiotics to finish this bread. Eating our bread symbiotically with live food rich in probiotics is one of our core principles for nourishing the gut microbiome. In this loaf, we use honey and cultured butter. Please do take the time to make the butter as instructed, and connect to your local honey producer to buy unpasteurised honey (you could even contact your local dairy too to see if you can use local cream for your butter). It's all about the joy of meeting people and chatting to them, and learning more about the ingredients you eat with your bread.
Please use the Sourdough Flavour Wheel card to help you with your notes, and I hope to see your loaves posted in the forum.
Equipment
- mixing bowl
- whisk
- spatula
- 2 x 900g (2lb) loaf tin, measuring 25 x 13 x 8.5xm
- greaseproof paper
- a jug of tepid water to dip your hands into when handling th dough
Tin Size
- 900g (2lb) loaf tin, measuring 25 x 13 x 8.5cm OR 9 x 5 x 3 inches (USA)
Tin Advice
Grease generously with butter, then add a tablespoon of flour and tap until covered and knock out any excess
Suggested Starter
Status of Starter
bubbly, lively second-build starter
Hydration
75%
DDT
27°C (80°F)
Flours
To Ferment Your Dough
- 200g bubbly, lively second-build starter
For The Dough
- 750g water at 28°C (remember to reserve 50g for the bassinage)
- 500g organic stoneground wholegrain spelt flour
- 500g organic roller-milled white flour
- 20g fine sea salt
- 40g sesame seeds
- butter, for greasing
- 1 tablespoon of cultured butter & honey mixed together
Baking Time
45–50 minutes; it should have a beautiful burnished copper crust
Oven Position
middle shelf
Preheat Oven To
220°C/200°C fan/425°F/gas mark 7
Bake At
180°C/160°C fan/350°F/gas mark 4
Baking Tips - During/After Baking
- Remove the bake from the oven and leave to cool in the tin for 5–6 minutes before turning it out onto a wire rack to cool completely.
- This recipe is finished with a probiotic syrup, vinegar or honey. Remember to drizzle over the syrup/honey to finish while the bake is still warm – but not too hot, or it will denature your probiotics.
Tutorials
Total Active Time: 10 minutes
Step | Timings | Active Time (min) |
---|---|---|
Read my essential time-saving tips before you begin .baking | Before you start | |
Refresh starter (first build) | Day 1, 8pm | 1 |
Refresh starter again (second build) | Day 2, 8am | 1 |
Mix dough vigorously, then leave for 30 minutes. | Day 2, 7pm | 2 |
Autolyse for 30 minutes; refresh starter while you wait. | Day 2, 7.02pm | |
Bassinage 1: incorporate 25g of the reserved water | Day 2, 7:30pm | 1 |
Bassinage 2: incorporate the last 25g of the reserved water. Rest for 15 minutes. | Day 2, 8pm | 1 |
Transfer the dough to the tin and cover. Leave to prove overnight on the side in the kitchen. | Day 2, 8pm | |
Pop your starter back into the fridge | Day 3, 8am | 1 |
Sprinkle the reserved sesame seeds on top, then bake your bread | Day 3, 8am | 2 |
Drizzle the warm loaf with butter and honey. | Day 3, 8:50am | 1 |
Take photos for the Club forum | Before you eat it! | |
Total Active Time | 10 |
Guidance, tips & techniques
Before you begin baking, please re-read the the essential time-saving tips. Hopefully by now you have found cups and vessels that hold the right amounts of water and flour to use the simple shortcuts suggested. If you do not follow these time-saving tips, it will take longer.
Build your starter
This is your third bake, so if you have been baking every day, then you might not need to double-refresh your starter. However, if you leave it more than three days between bakes, then do a back-to-back double refreshment. This will rebuild your starter and make it robust enough to raise your bread. There are many recipes for what to do with the discard here.
Mix
This is a quick mix. In a bowl, combine 700g of the water with your lively, bubbly sourdough starter. Whisk well, then add the flours and the salt. Mix your dough vigorously using a strong spatula for about 2 minutes. It will come together to form a stiff ball. Leave this to rest on the side on the kitchen for 30 minutes. While your dough is autolysing, this is a good opportunity to refresh the remaining starter in your jar and set it aside to ferment overnight at room temperature.
Bassinage
When the gluten has had 30 minutes to develop, you can begin your bassinage. Bassinage is the technique of adding water to dough over a period of time. It's easy to do. Simply add the next 25g of the water to the bowl and squidge the dough with your hands to mix it in. It should take less than 1 minute to do this. Cover and leave the dough for another 30 minutes, then repeat with the remaining 25g water. Again, this should take less than a minute. There are detailed instructions on how to do this in the link in the steps.
Prove
Prep your tin, then sprinkle 10g (about 1 tablespoon) of your sesame seeds across the base of the tin, and another 10g over the dough. Place the dough in the tin and artistically sprinkle another 10g on top of the the dough – I am usually enjoying myself at this point! Save the remaining 10g for tomorrow, to add just before you bake. Cover with a shower cap and leave to prove on the kitchen table overnight. My kitchen is usually about 21°C.
Put your starter back in the fridge
8am on day 3 is an important moment, as both your loaf and your starter should have doubled overnight. Before you preheat the oven, put your starter back into the fridge until you next want to rebuild it again, ready to bake.
Baking your bread
Remember to sprinkle the remaining sesame seeds on top of the bread before baking. Preheat the oven to 220°C/gas mark 7 for 30 minutes, then add the bread and reduce the oven temperature to 180°C/gas mark 4. Bake for 45–50 minutes until it has a lovely burnished copper crust. If you like a crustier finish, you can also remove your loaf from the oven and take it out of the tin, then return the ‘naked’ loaf to the oven for a few minutes to create a lovely crunchy crust on the parts of the loaf that were covered by the tin.
Finish the baked loaf by drizzling it with the honey and cultured butter while it is still warm.
Probiotic Serving Suggestion
How to Store
Once cool, store your loaf in a tin, as the honey and butter can make it a bit too sticky to wrap in a tea towel. Best enjoyed within 3–4 days.
![](https://thesourdoughschool.com/wp-content/uploads/2021/05/Soourdough-Sesame-Honey-3-330x496.jpg)
![](https://thesourdoughschool.com/wp-content/uploads/2021/05/Sourdough-Sesame-Honey-330x496.jpg)
![](https://thesourdoughschool.com/wp-content/uploads/2021/05/Soourdough-Sesame-Honey-2-330x496.jpg)
Learning Outcome
Make sure that you compare the texture of the flour and the colour as well as the end result. Keep all the other parameters identical, so it is literally a side-by-side comparison.