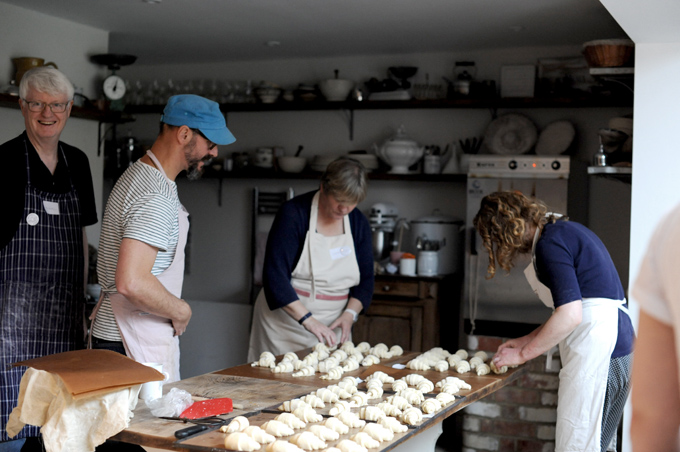
Please note that this is an advanced recipe and technique. It is not easy to make croissants, especially sourdough ones. That said, they are utterly delicious and well worth mastering.
Vanessa
x
Ingredients:
Preferment
Main dough
Butter for lamination
Egg wash 1 egg lightly beaten with pinch of salt mixed in Equipment:
1 Rolling pin 2 Baking tray lined with silicon paper or non-stick parchment 1 Roasting tray |
Build up the sourdough 8 hours — Make the Pre-ferment 8-9 hours — Make the dough 50minutes — Let the dough rise 2hours before placing into the refrigerator overnight — Knockback and laminate the dough 2 hours — Roll out and cut into croissant shape 15 minutes —-Final proof 2-4 hours — Baking 15-25 minutes —- Cooling 10minutes
Method
- This recipe makes 8 Croissants.
- For this recipe you require 3 mixing bowls 1 big 2 small that when placed on the big bowl can act as a lid.
- For the leaven . In one of the small bowls put the 70g of flour, 10g sugar and set aside.
- In a large mixing bowl dissolve the sourdough (active sourdough you have built up the night before) in the warm water. Add the flour and sugar mixture and mix together to make a paste consistency scrape round the edges and cover with the bowl you weighed the flour in. Leave to ferment in a cool place (not in the refrigerator) for about 8hours. This is the wet mixture.
- While the pre-ferment rises, in another small bowl weigh out 180g flour and 5g salt, 20g of caster sugar 20g butter chopped into small pieces and set aside. This is the dry mixture.
- After 8-9 hours the pre-ferment you made should be bubbling if not, leave to ferment for a further hour until it is bubbling.
- Uncover the bubbling leaven and pour the warm milk and the dry mixture (step 5) mix everything until it comes together.
- At this point the dough should come together and be a little stiff with not all the flour mixture mixed in. Cover the mixture with the small bowl that had the flour mixture in it.
- Leave to stand for 10 minutes.
- Start mopping up any flour mixture that is not mixed in, then squash the dough with your knuckles and fingers to flatten out any lumps. It should now look pancake-shaped.
- Lift a portion of the dough up from the side and fold it into the middle and press with your knuckles.
- Turn the bowl 90° clockwise and lift another portion of the dough up from the side and fold it into the middle and press with your knuckles.
- Repeat steps 12 and 13 another 8 times 10 times in total.
- Turn the ball of dough over in the bowl and, make a finger mark in the dough (to indicate the first knead), and cover with the bowl that had the flour in it.
- Leave to rest for 10 minutes making sure that it is covered.
- Repeat steps 11 to 16 another 3 times making sure the mixture is covered between kneads and remembering to mark the dough indicating the amount of kneads done. If the dough starts to resist and starts to tear put less pressure as you knead also if you can only knead it 8 times and it starts to resist making it difficult to knead stop.
- After you have done 4 kneads with a 10 minute break between them leave the dough to rise for 2 hours in a warm place, making sure it is covered. If the dough is not covered a skin will form and this will affect the end result.
- You are looking for a smooth, stiff elastic dough. If you think the dough is not kneaded enough repeat steps 11-15 another time.
- Place the dough in the refrigerator overnight making sure it is covered so a skin does not form.
- Shape the butter into a nice flat rectangle about 12cm x 7cm and 2cm thick .
- Place the butter in the refrigerator.
- The next day, remove the dough and the butter, and leave on the side for about 10 minutes, from the refrigerator.
- Remove the dough from the bowl, using a light sprinkling of white flour so the dough does not stick. Shape into a ball.
- To shape the ball of dough into a rounded loaf: first, flatten the dough slightly with your palm.
- Take a corner of the dough and fold it right over to the opposite side then turn the dough 90° clockwise,
- Repeat step 26, four to five more times until it is a roundish shape and then turn the dough over, tuck in the underneath of the dough with your fingers as you rotate the dough clockwise until you’ve formed a rounded ball.
- Once the dough is shaped into dough into a ball making a cross cut on the surface cutting about half way into the dough.
- Leave the butter to get a little soft i.e. not too soft that you can press you finger strait through but when you press your finger in it, it makes a dent in the butter.
- Roll the dough to about the same thickness as the butter about 2cm thick in the middle and slightly thinner on the 4 triangular ears.
- Place the butter in the middle of the square of dough. Making sure it fits, if it does not fit roll the dough a bit bigger.
- Now fold the corners of the dough (triangles) to the centre, so that it is like a closed envelope with the butter in the middle.
- Gently flatten the dough with the butter with a rolling pin; pushing the butter in the corners of the dough making sure the butter is dispersed everywhere in the envelope of dough and butter.
- Fold the bottom part of the rectangular dough to the centre, and then fold the other part on top.
- You should have three rectangular pieces of dough piled on top of each other; this is your first turn.
- Cover the dough with plastic and place it in the refrigerator for 20 -30 minutes.
- After 20 -30 minutes remove from the refrigerator and roll the dough into a rectangle about 1cm thick making sure the fold is facing left or right before the pastry is rolled.
- Now repeat (steps 36 – 38) another 3 times with 20 -30minutes to rest the pastry to make it easier to roll out and also placing it in the refrigerator so the butter does not get soft, the sourdough in the dough does not rise too much. If you do find the latter happens place it in the freezer for 10 minutes to make it easier to work with.
- You will have given the pastry 4 single turns.
- Allow to rest for a further 20 -30 minutes in the refrigerator.
- Role the pastry out to about 21cm wide by 45cm long +/- 3 millimetres, about 1½ A4 paper length and width.
- Now divide the dough into 2 by folding it in half and cut, so you should have 2 pieces.
- Repeat the process again so you have 4 pieces.
- Now cut each rectangle across so it is a triangle shape, you should have 8 triangles.
- Now roll each triangle into a croissant with the top of the triangle facing away from you.
- Start by placing the triangle in front of you with the point at the top.
- Make a small cut in the middle on the bottom of the triangle about ½ cm deep.
- Then pick up the triangle and gently stretch it making sure it does not break.
- Line up the point of the triangle with the small cut at the bottom.
- Stretch the bottom part of the triangle so the little cut becomes an upsidown v then fold it over towards the top to make a v, carry on rolling it up placing pressure on the sides until it is fully rolled up.
- Place the croissants on a tray lined with silicon paper or non-stick parchment and paint them with egg wash.
- Allow to rise in a warm place until you see the folds in the pastry separating and the croissant has increased in volume. This should take about 2-3 hours. To create a warm place I pre-heat my oven to 50C once it reaches temperature turn it off. Please make sure it is off, as the butter will melt.
- Check how they are doing every 30-40 minutes just to check.
- When you see the folds separating, pre heat the oven to 250C (500F) Gas 9 with a roasting tray at the bottom.
- When the Croissants are ready lightly paint the egg wash for the second time.
- Place the tray with the egg washed croissants the in the oven at 250C / 250C (500F) Gas 9 and pour a cup of water on the hot tray to form steam, lower to 200C (400F) Gas 6.
- Bake for +/- 15 – 25 minutes until golden brown.
- Bake until golden in colour.
- Don’t worry if you see a little butter coming out on the tray while it is baking the butter should all be absorbed when it cools.
- Allow to cool before eating.