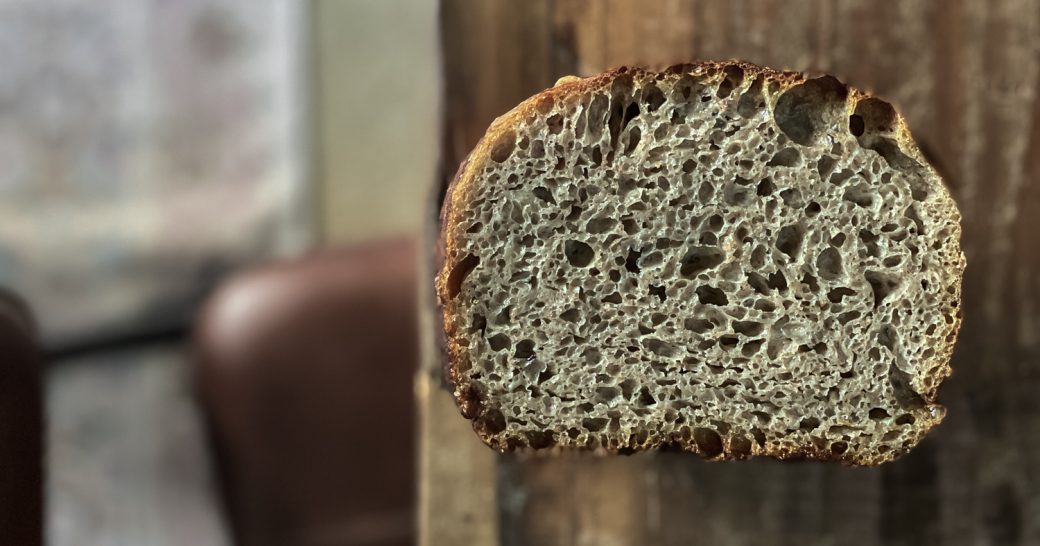
In this recipe you will learn to make an ambient basic sourdough 50:50 tin loaf
Learning Objective
This recipe is the foundation loaf. You apply the basic principles of fermentation and use the specific timings, temperature and flour needed to achieve a classic Sourdough Tin Loaf that can be made in just 10 minutes of active time. The aim of this recipe is to put into practice the knowledge of when best to use your starter, and how to find a rhythm and routine to your baking, making it possible for anyone with a busy life to be able to bake sourdough.
Makes: | 2 |
---|---|
Level: | Absolute beginner |
Created Over: | 3 days |
Kind of Bake: | Ambient overnight – 10-minute style – mixed in the evening and baked in the morning |
Gut Factor: | Introducing wholegrain and probiotics |
Diversity Score: | 5 (if you include salt, oil and butter) |
---|---|
Suggested Botanical Blend: | Use organic stoneground flour |
Prebiotic: | The fibre in wholegrain flour is a prebiotic |
Probiotic: | Cultured butter |
Recommended For: |
|
Einkorn is an ancient grain, believed to be one of the first cultivated by man.
One of the quirks of einkorn flour relates to its protein levels. Although the flour has a protein level of 10-11%, einkorn has very little elasticity. Try stretching the dough and you’ll end up with lumps of it breaking off in your hands. Because of this, I find one of the best ways to bake a loaf made with einkorn flour is in a tin. This gives the dough the support it needs and makes it much more manageable.
I have to say the flavour of these loaves was amazing. The classic sourdough made with einkorn was soft, with a warm honey colour and an almost cake-like texture. The initial aromas were of freshly mown grass, along with a hint of molasses giving it slightly sweet scent. As we bit into a slice of the loaf, we noted that it had a soft, buttery texture. There was a damson gin aroma in the crust, rich and fruity, followed by a maple syrup flavour in the background. And as a final flavour, the acid tang of the sourdough came through. The crumb had a more spicy, cinnamon and very aromatic flavour. You can see the flavour profile in the pictures below.
It is also one of the fruitiest flours I’ve ever baked with. My thoughts were that it was like biting into late summer – all those mixed aromas and flavours of freshly cut grass in September, along with the fruitiness of damsons and blackberries. I challenge you not to eat half the loaf in one sitting… it really is that good!
Equipment
- Mixing bowl
- Whisk
- Spatula
- 2 x 900g (2lb) loaf tins (see below)
- Olive oil spray
- Oven gloves
- A jug of tepid water in which to dip your hands when handling the dough
Tin Size
- 900g (2lb) loaf tin, measuring 25 x 13 x 8.5cm OR 9 x 5 x 3 inches (USA)
Tin Advice
Grease generously with butter, then add a tablespoon of flour and tap until covered and knock out any excess
Suggested Starter
Status of Starter
bubbly, lively second-build starter
Hydration
75%
DDT
26°C (79°F)
To Ferment Your Dough
- 200g bubbly, lively second-build starter
For The Dough
- 750g water at 28C° (82°F) (remember to reserve 50g to bassinage with)
- 1kg organic stoneground Einkorn
- 20g fine sea salt
- Butter, for greasing the tin
Baking Time
45–50 minutes
Oven Position
middle shelf
Preheat Oven To
220°C/200°C fan/425°F/gas mark 7
Bake At
180°C/160°C fan/350°F/gas mark 4
Baking Tips - During/After Baking
- Remove the bake from the oven and leave to cool in the tin for 5–6 minutes before turning it out onto a wire rack to cool completely.
- Everyone's oven is slightly different. Use the timings given here as a guide and always check your loaf towards the end of the baking time to see how much longer it needs.
Tutorials
Total Active Time: 9 minutes
Step | Timings | Active Time (min) |
---|---|---|
Essential time-saving tips before you begin baking | Before you start | |
Refresh starter (first build) | Day 1, 8pm first build | 1 |
Refresh starter (second build) | Day 2, 8am second build | 1 |
Mix vigorously | Day 2, 7pm | 2 |
Autolyse for 30 minutes | Day 2, 7.02pm | |
Bassinage 1: incorporate 25g of the reserved water. | Day 2, 7.30pm | 1 |
Bassinage 2: incorporate the last 25g of the reserved water, then rest for 15 minutes | Day 2, 7.45pm | 1 |
Transfer the dough to the tin and cover. Leave to prove overnight on the side in the kitchen | Day 2, 8pm - Overnight | |
Return your starter to the fridge | Day 3, 8am | 1 |
Bake your bread | Day 3, 8am | 2 |
Total Active Time | 9 |
Guidance, tips & techniques
Before you begin baking, please read the essential time-saving tips to make sourdough in just 10 minutes. To put it plainly, you won't be able to make this recipe in 10 minutes if you do not follow the advice on this page.
Build your starter
If you bake every day, then you might not need to double-refresh your starter. However, if you leave it more than three days between bakes, then do a back-to-back double refreshment. This involves two refreshments to rebuild your starter and make sure it is robust enough to raise your bread. There are many recipes for what to do with the discard here.
Mix
This is a quick mix. In a bowl, whisk together your lively bubbly sourdough starter with 700g of the water (remember to reserve the other 50g of the water). Once combined, add the flours and the salt* and mix your dough vigorously using a strong spatula for about 2 minutes. It will come together to form a stiff ball. Leave this to rest on the side in the kitchen for 30 minutes. While your dough is autolysing, this is a good time to refresh the remaining starter in your jar and set it aside to ferment overnight at room temperature.
* Note: yes, I do want you to put the salt in with the initial mix of the dough. Recipes later on will ask you to hold back salt until later, but not with this technique.
Bassinage
When the gluten has had 30 minutes to develop, you can begin your bassinage. Bassinage is the technique of adding water to dough over a period of time. It's easy to do. You just add 25g of the reserved water at a time, squidging the dough with your hands to mix this in (you can dip your hands in the jug of tepid water before handling the dough to avoid sticking). It should take less than 1 minute to mix in the first 25g water. Cover and leave the dough for 15 minutes. Repeat with the remaining 25g water, then allow the dough to rest for about 10 minutes. There are detailed instructions on how to do this in the link in the steps.
Prove
Prep your tin, then place the dough in the tin. Cover with a shower cap and leave to prove on the kitchen table overnight. My kitchen is usually about 21°C (70°F).
Return your starter to the fridge
Day 3 at 8am is an important moment, as both your loaf and your starter should have doubled overnight. So, before you bake your loaf in the oven, put your starter back into the fridge until you next want to rebuild it again for another bake.
Bake
Preheat your oven to 220°C/200°C fan/425°F/gas mark 7 for 30 minutes, then reduce the oven temperature to 180°C/160°C fan/350°F/gas mark 4 to bake. Before baking, drizzle the olive oil down the sides of the loaf before putting the tin in the oven. Bake for 45–50 minutes: it should have a beautiful burnished copper crust.
Tip for baking your bread
If you like a crustier finish, remove your loaf from the oven at the end of the baking time and remove from the tin, then return the ‘naked’ loaf (without the tin) to the oven for a few minutes to create a lovely crunchy crust on the parts of the loaf that were covered by the tin.
Probiotic Serving Suggestion
How to Store
Once cool, wrap your loaf in a tea towel. Best enjoyed within 3–4 days.
![](https://thesourdoughschool.com/wp-content/uploads/2020/10/19-04-SOURDOUGH-SCHOOL-562-330x413.jpg)
![](https://thesourdoughschool.com/wp-content/uploads/2020/10/SOURDOUGH-SCHOOL-036-330x413.jpg)
Learning Outcome
This loaf allows you to make a loaf in just 10 minutes the results of the fermentation as your loaf bakes. You will learn about timings and temperature, and how to bake a basic tinned loaf that is a joy to eat every day.